

Unsure on how to paint your mdf wall panelling? We’ve put together an essential guide on how to make your mdf wall panelling look incredible.
Painting mdf wall panelling isn’t as simple as applying a few licks of paint. You don’t want to fall foul to the common mistakes most people make when painting their wall panels. There’s a few tips and tricks you’ll want to know before you get started:
Check Those Walls
If you’ve read any of our articles, you’ll notice this comes up a lot. Checking your walls for holes and cracks, lumps and bumps, before you start your mdf wall panelling project is super important. Unsightly blemishes can be fixed really easily, but if you don’t – it could ruin your panelling project, boo! For lumps and bumps, simply sand them down. For small holes – we recommend a smidge of Polyfilla and a little bit of sanding once dry. We would advise having cracks and larger holes looked at by a professional. Just to be on the safe side.

Prep Those Walls
Painting your walls white before you adorn them with wall panels will ensure the colour you paint the wall panneling will match the wall once painted. It’s crucial to have a good base to start with. Especially if you are planning on using lighter tones when painting your wall panels. The white undercoat will provide you with a fresh base to work from. If the paint on your walls is peeling – you need to remove it before you get to work. The same applies for wallpaper.

Prime Your MDF
This step should never be missed! Priming your mdf is imperative. Otherwise the mdf will absorb the paint and you’ll be left with large bubbles on the surface. Not a great look! Why does mdf need priming? It’s really porous so it will soak up the paint and leave you with a blotchy effect. Not only will this cost you more in paint, you might have to start again from scratch. We recommend applying 2-3 layers of primer to your mdf wall panels, make sure you allow drying time in between and before you begin painting them.

A Lick Of Paint
When applying paint to your wall panels you want to ensure the paint is evenly distributed, this can be achieved by using a small fluffy roller. By using a fluffy roller the paint application will be uniform, which is important because no one wants patchy wall panelling. You can use a paint brush to cut in and reach those nooks and crannies that the roller simply won’t reach. Or if you’re really into spending long hours simultaneously painting and daydreaming – you can just use a paintbrush to do the whole project.

Drying time
Allow for drying time between each coat, this applies to both the primer and the paint. Check the instructions on both products as these will advise you of the amount of time you need to leave before adding the next layer. Drying time is important because paint can flake off or become tacky if you add another layer before it’s dry.
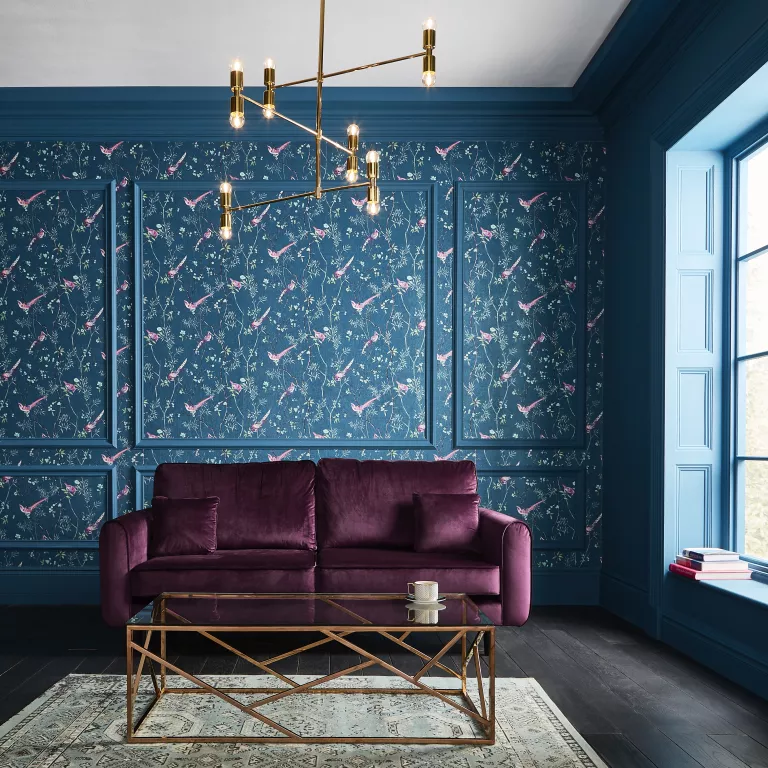
Spice It Up
One of our favourite trends right now is the combination of wall panelling and wallpaper. You can wallpaper above the wall panelling or apply wallpaper in the spaces between each panel. It enhances the wall panelling and allows you to introduce other shades and patterns to really give your interior walls some flair!
There you have it, everything you need to know about painting your wall panelling. If you’re stuck for wall panelling ideas – check out our gallery.